Normal Map Generation
Laigter aims to be a simple normal map generator. To tweak the normal map you only to play around with the sliders until you get the desired result. In this section what each of those sliders do will be explained.
Al the controls that affect the normal map generation are grouped under the Normal dock widget.
Enhance controls
The controls under this group affect the detail, or inner regions of the sprite. For a better understanding of what they do, lets put the controls under Bump group to zero.
There are just two controls under the Enhance group, Height and Soft.
Height Control
A normal vector can be thought of as the derivative of the height on a surface. If that height almost doesn’t change (like on a flat surface) the normal will point upwards (or to the screen, in our case of 2D textures). This will lead to the blueish color we talked about in the normal map example of the introduction section. So this control lets you chose how high is the difference in height between consecutive pixels. A lower value then, will result in a more flat normal map (more blueish). A higher value would mean normal vector directions point to other directions, and so, more colorful normal map (as colors represent components of the vector). The effect of the light will be more noticeable in this last case.
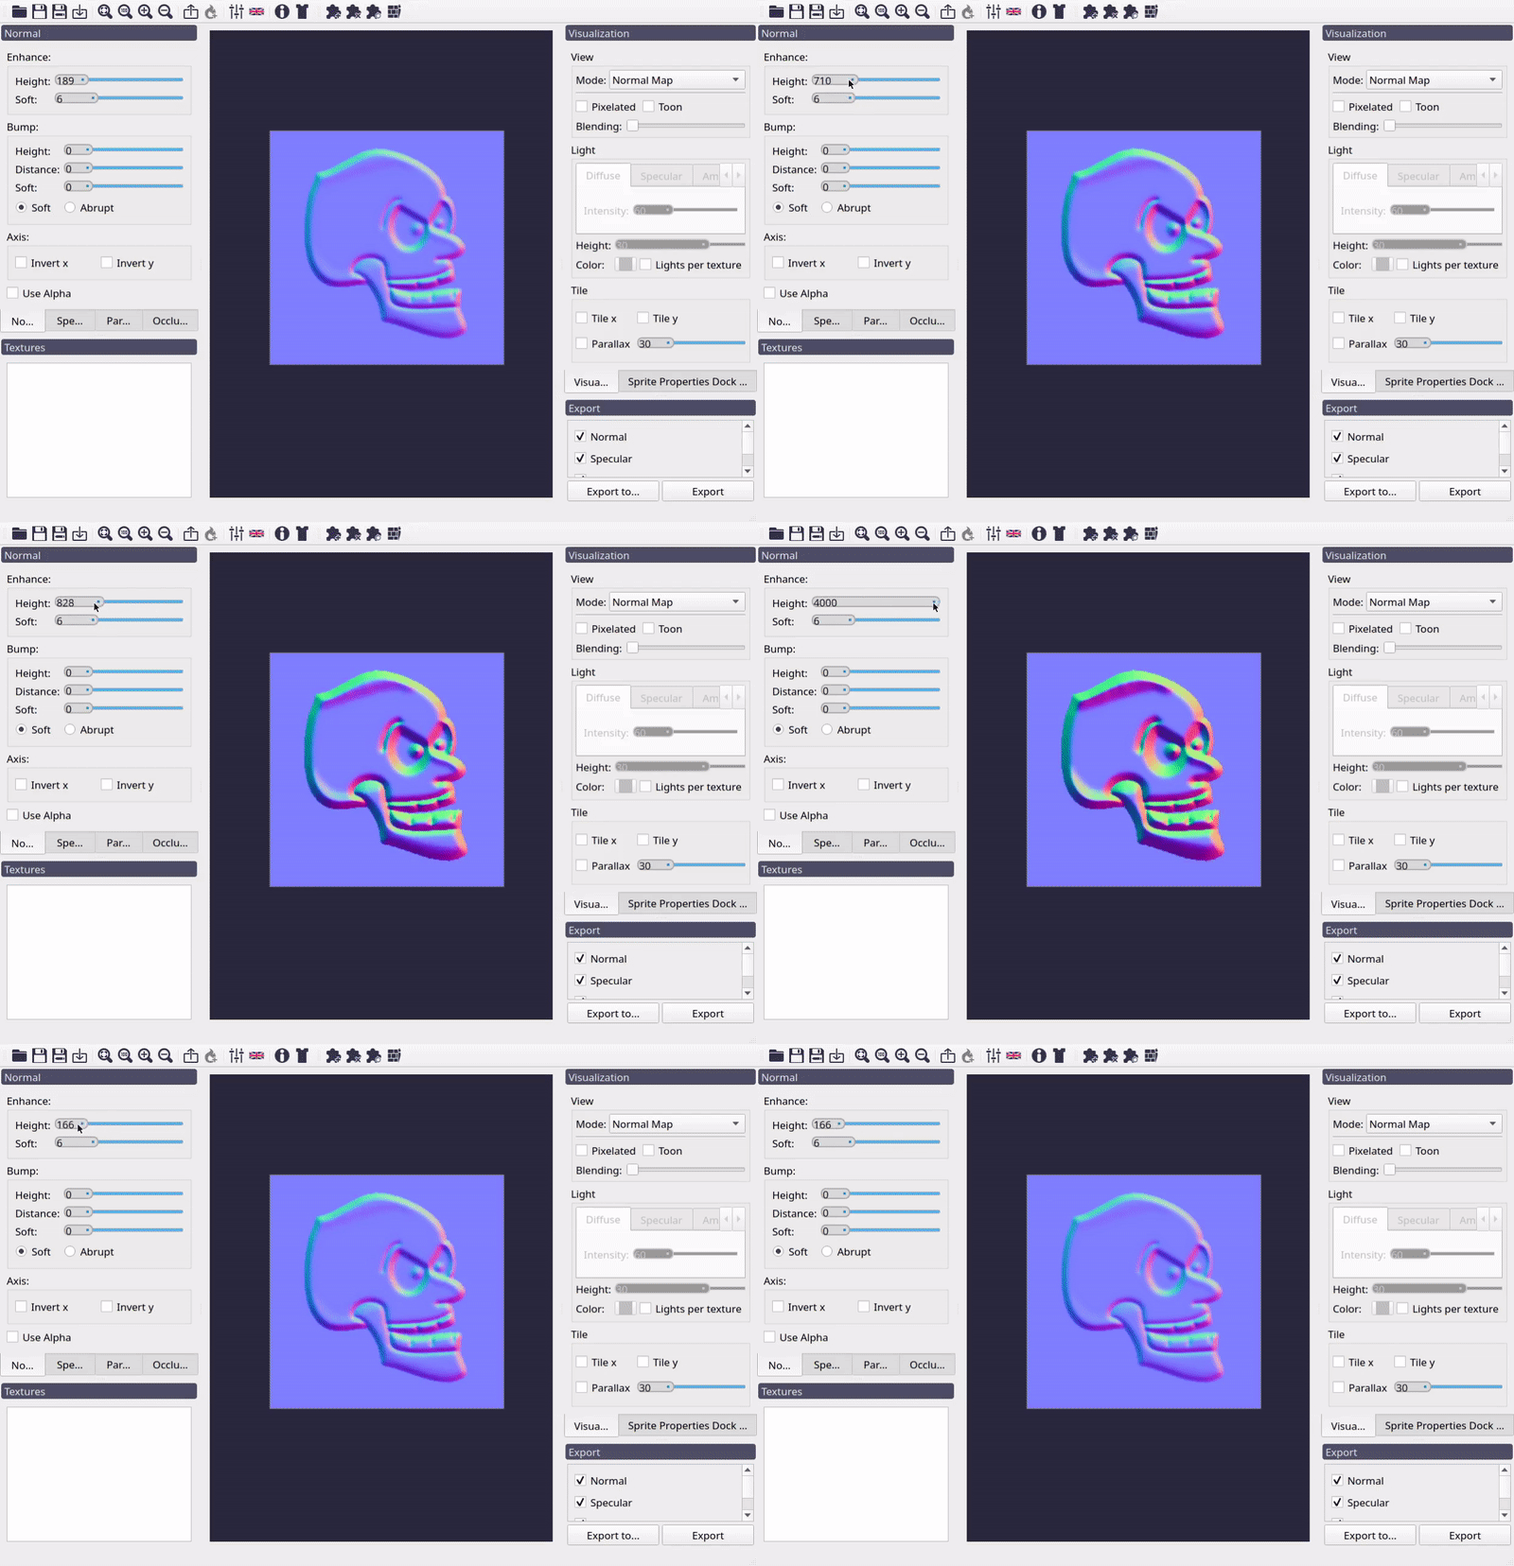
Effect of Enhance height control in the normal map.
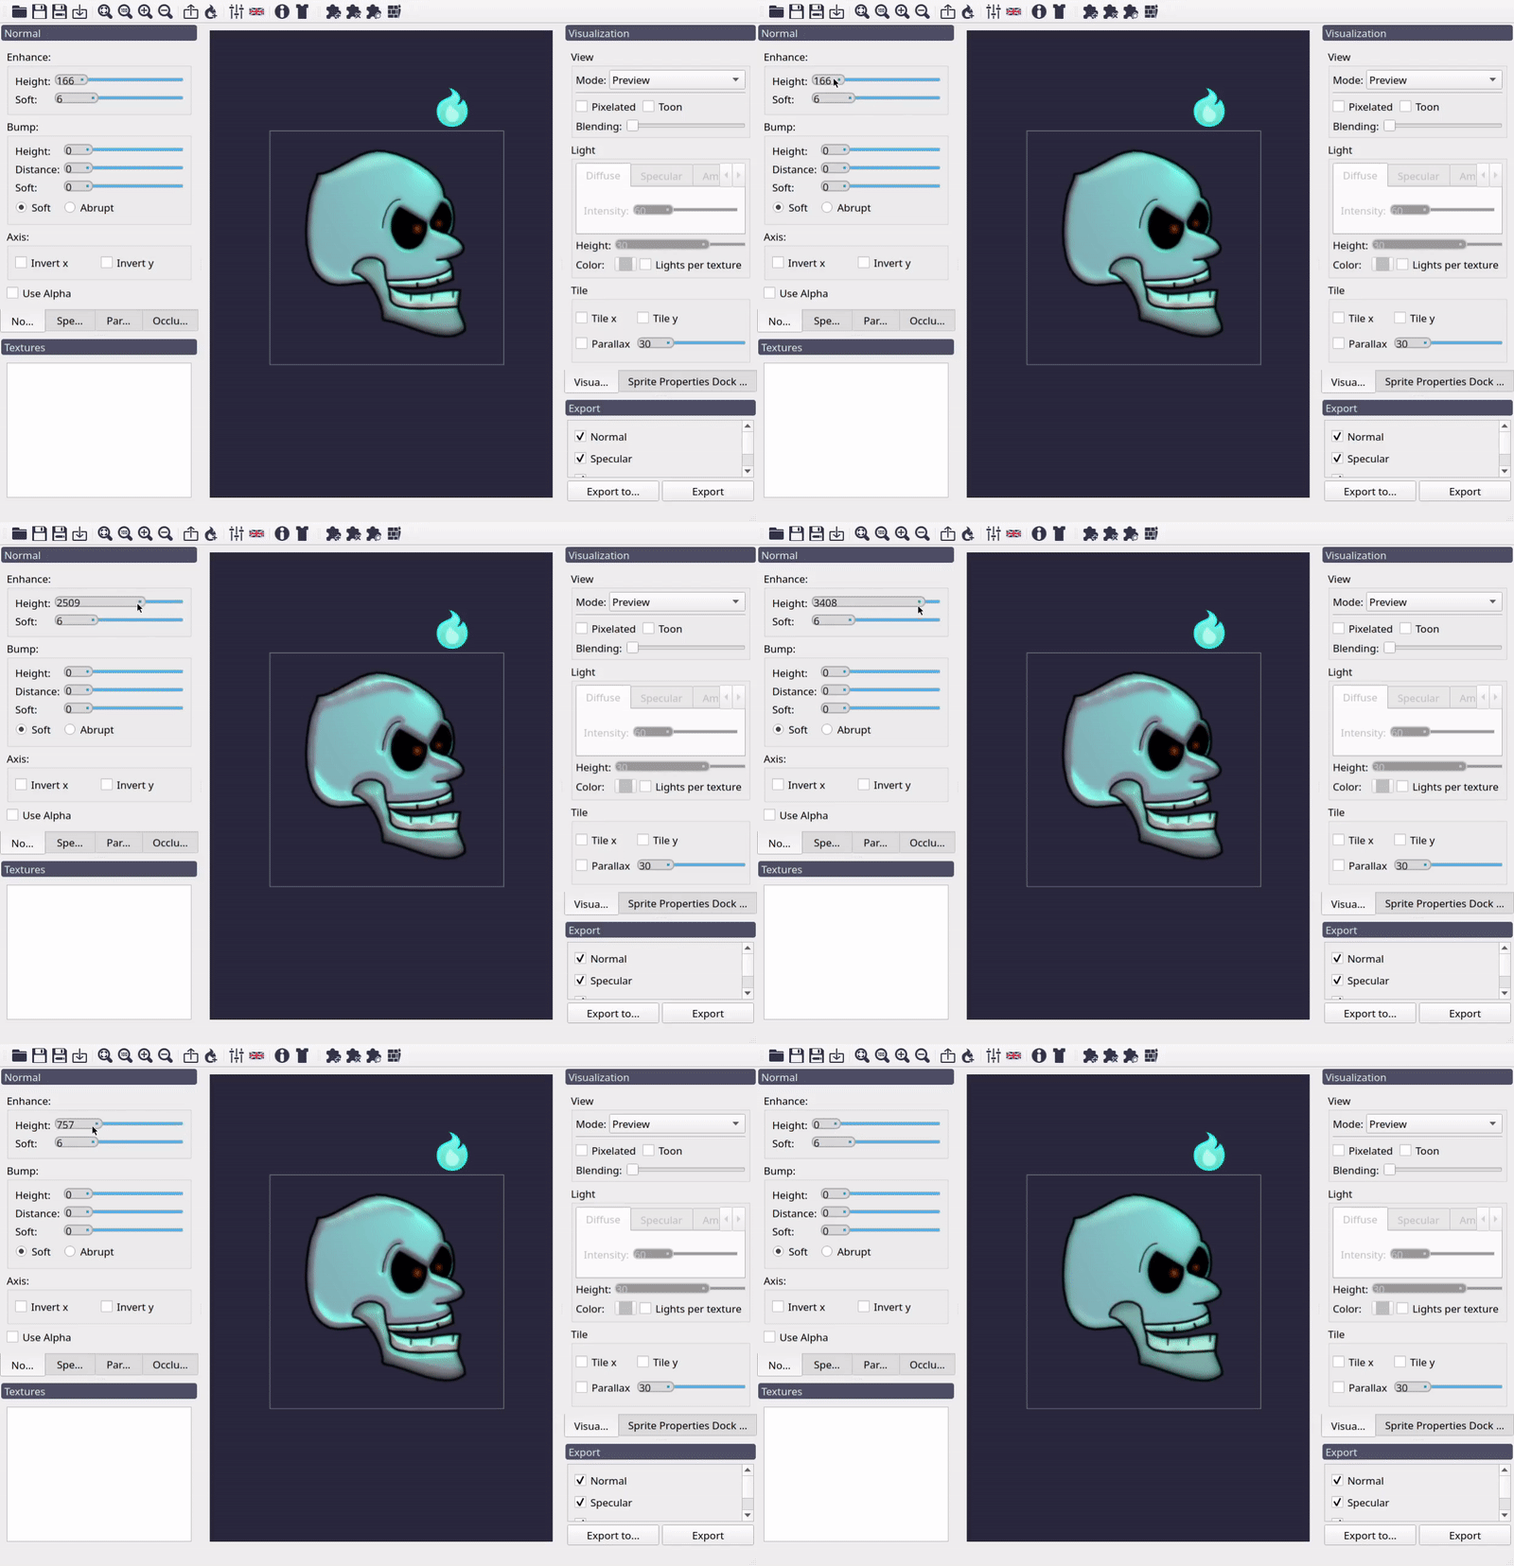
Effect of the Enhance height control in the preview.
Soft Control
After the normal map due to the “Enhance controls” was generated, a blur is applied to get a better-looking result. The amount of blur applied is controlled with this slider.
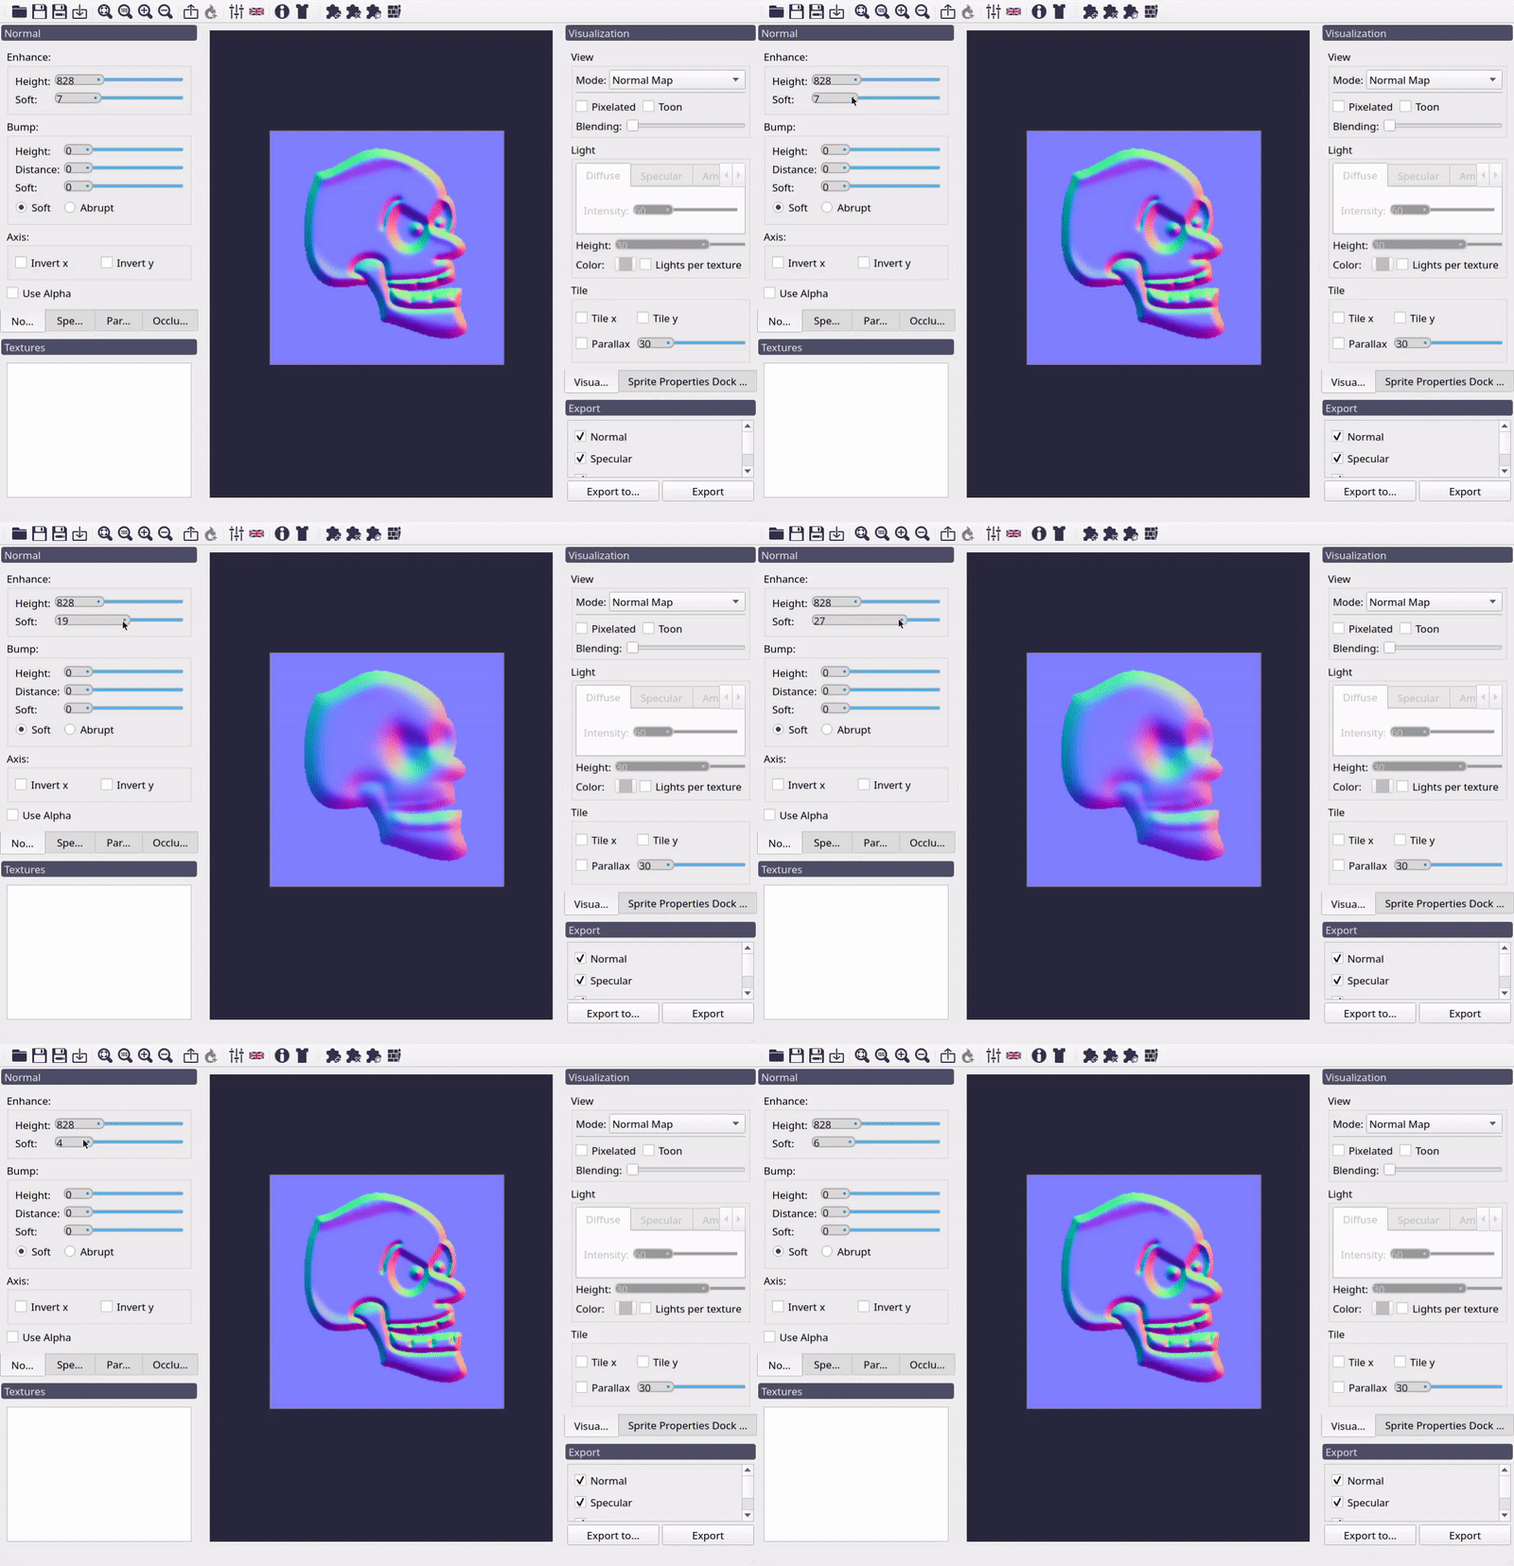
Effect of Enhance soft control in the normal map.
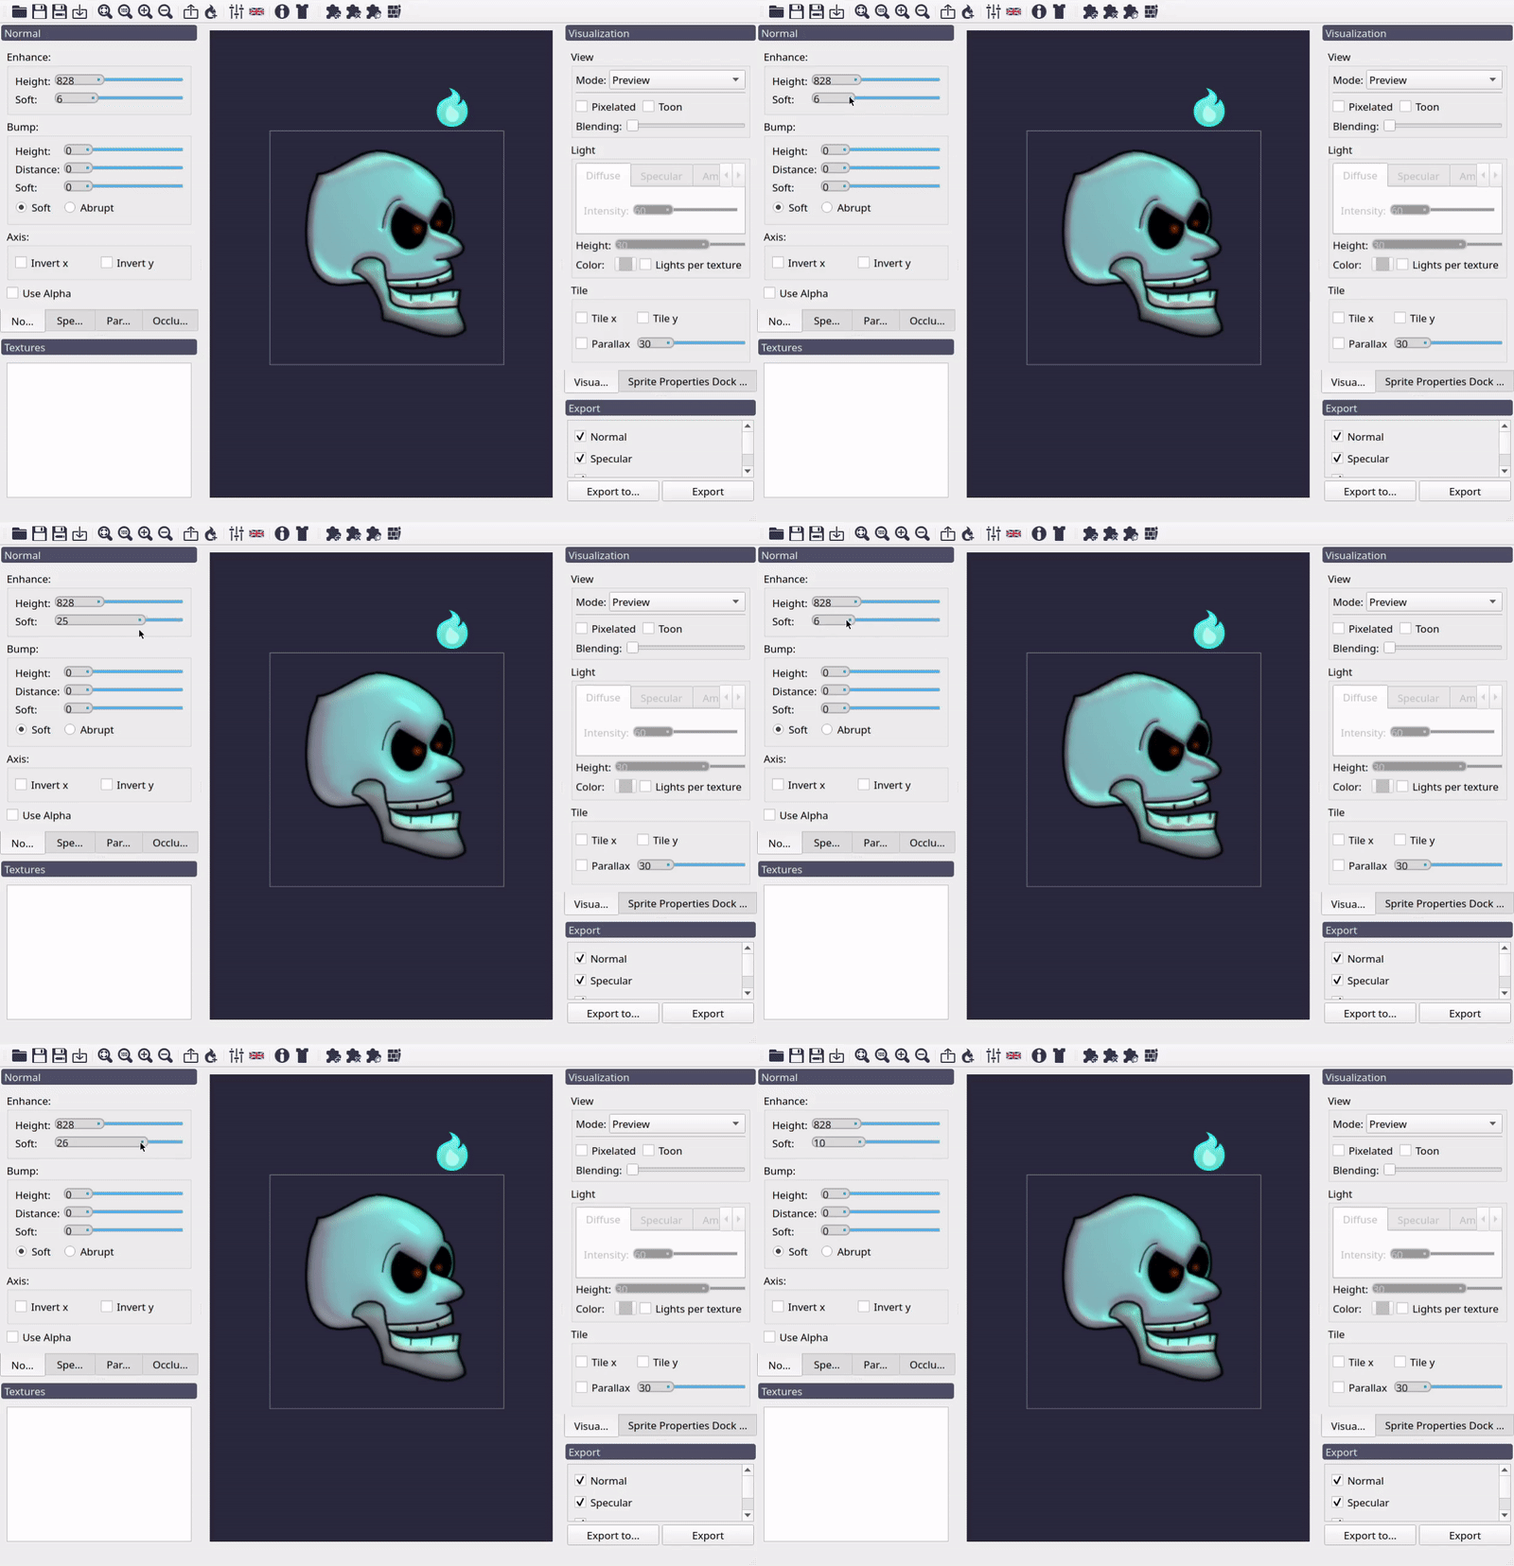
Effect of the Enhance soft control in the preview.
Bump controls
Enhance controls are meant for generating normals of inner details of the texture. But for 2D sprite, is useful to give some bump effect from its edges. This means, make the sprite look like it has volume. This is made by making a distance transform with the alpha mask of the texture, and using it as a heightmap for calculating the normal vectors.
For this, we use the controls under the Bump group, which has four different controls. for a better understanding of this controls, lets put the Enhance controls in zero.
Height Control
This control makes the same effect as the one with the same name described in enhance_controls, but this time to the normals generated from the edge of the texture.
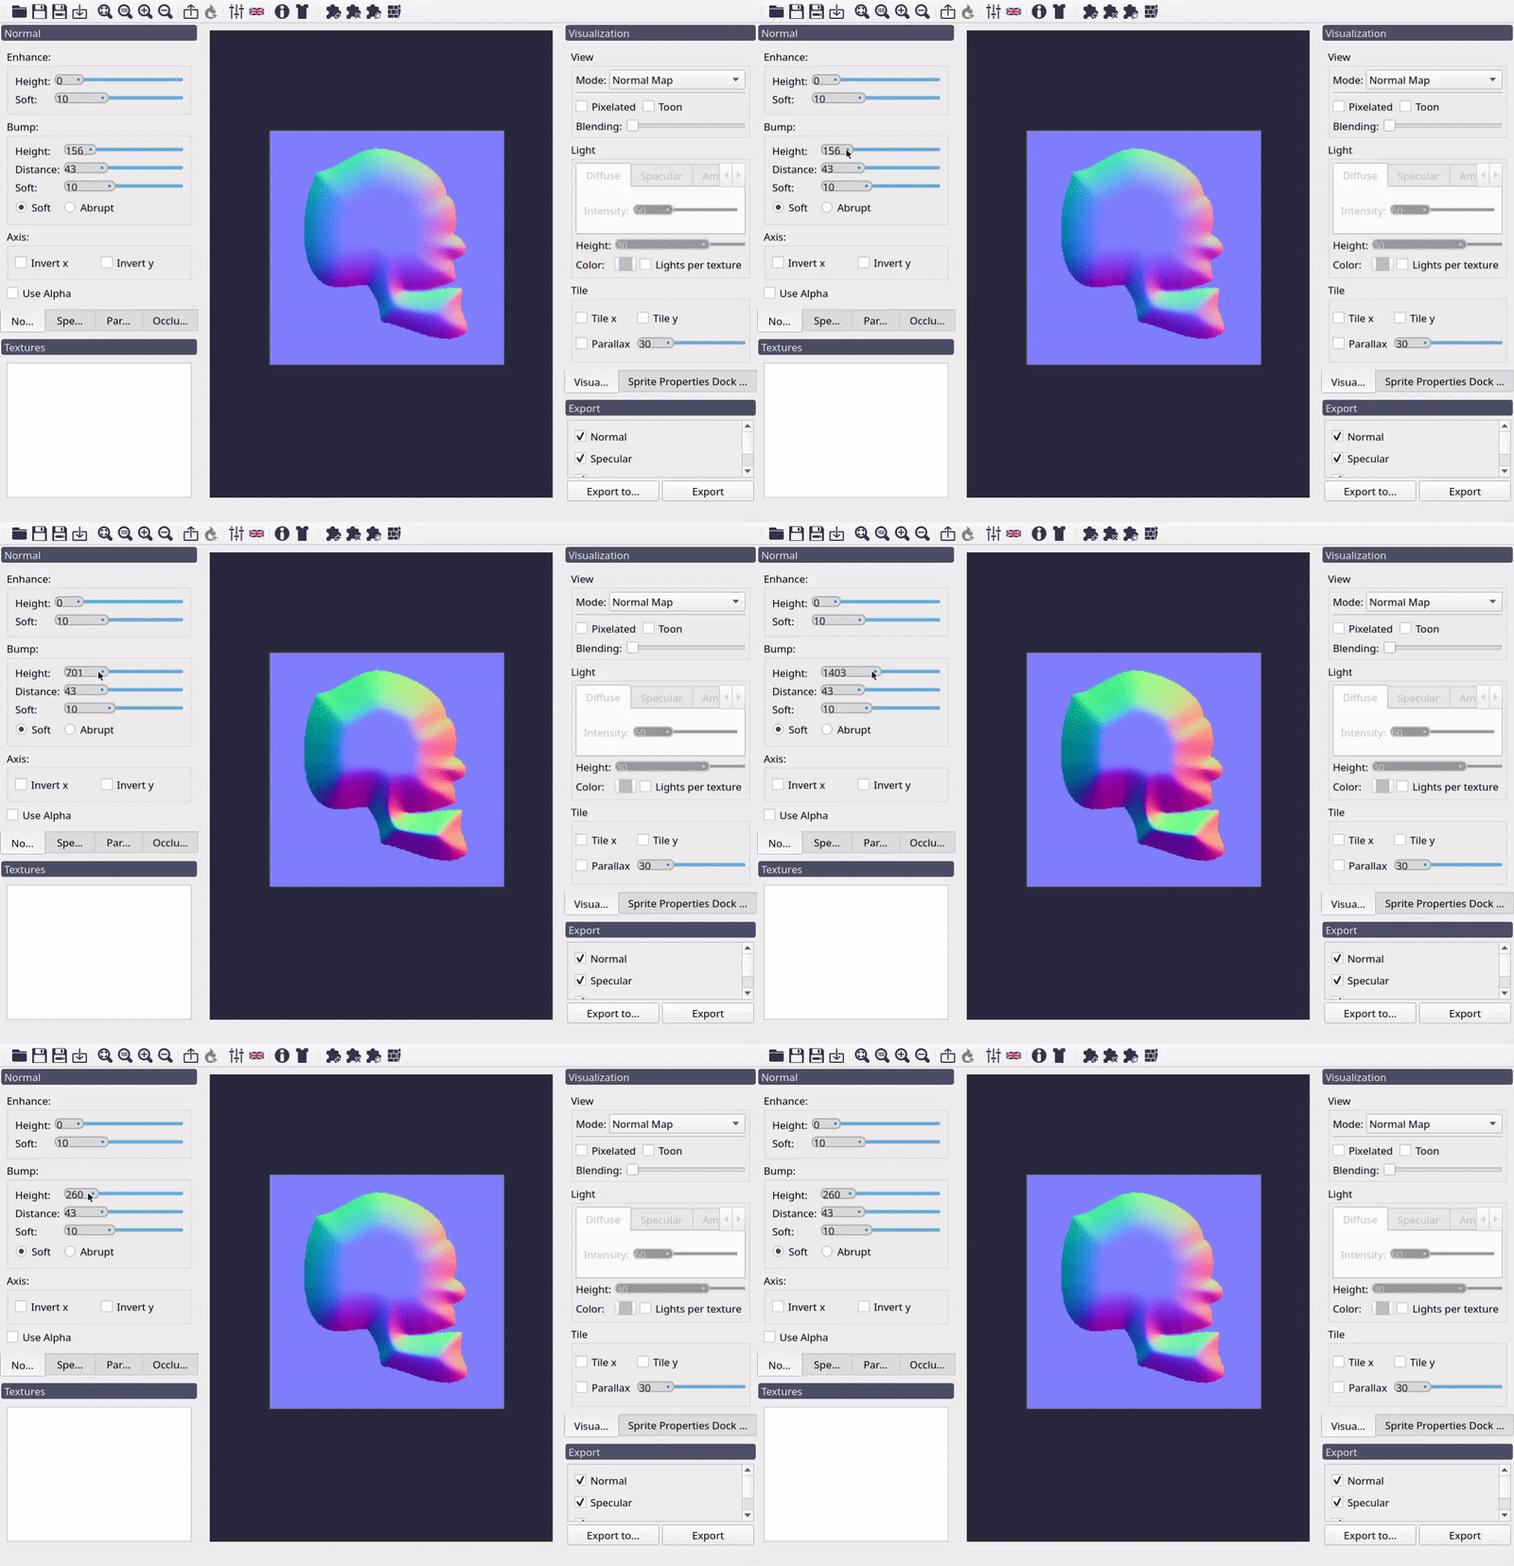
Effect of Bump height control in the normal map.
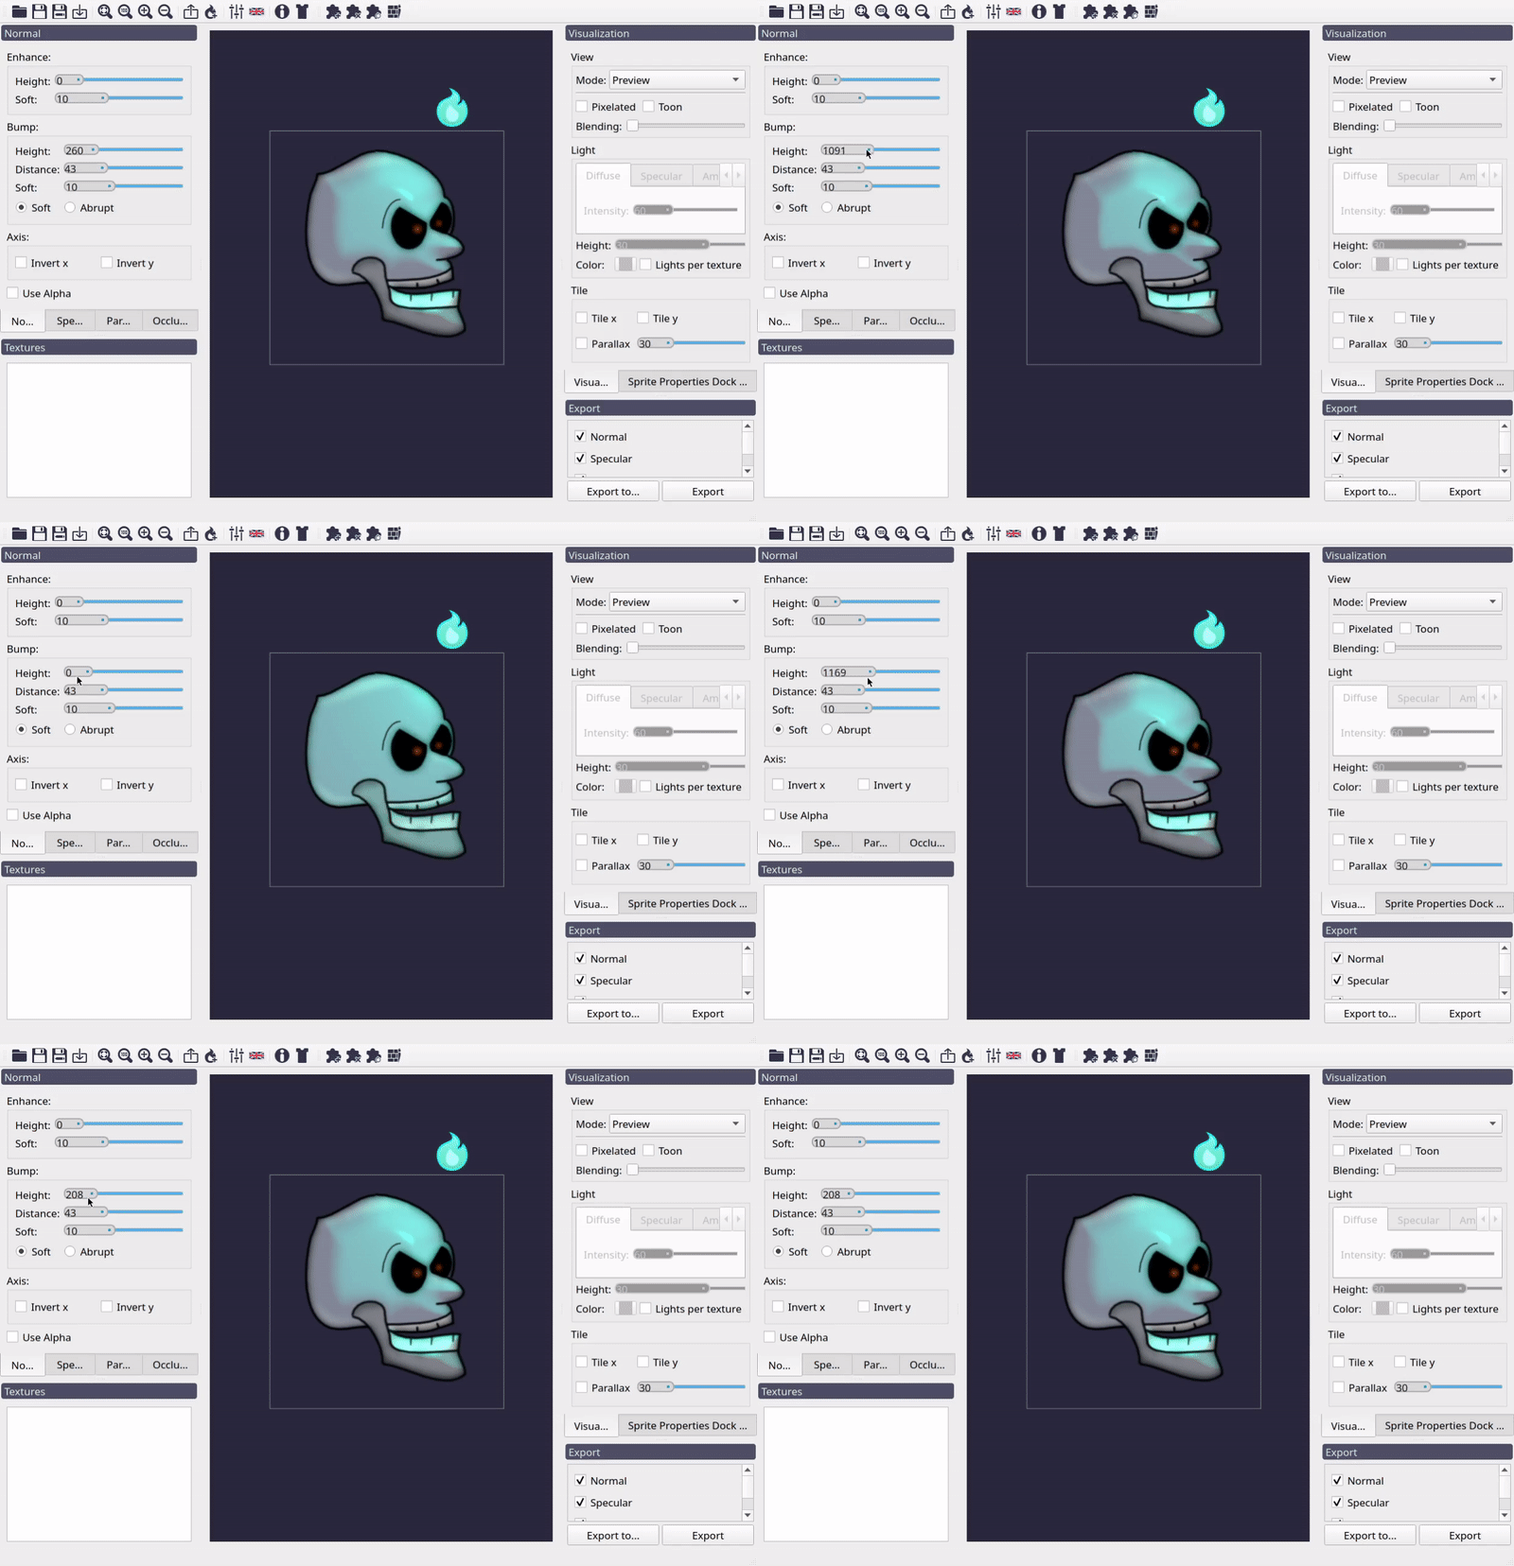
Effect of the Bump height control in the preview.
Distance Control
The previous control helped us to tweak the normal vector direction from the edges of the texture. This control specifies the distance from the edge of the texture to the center of it before the Bump normal map flattens.
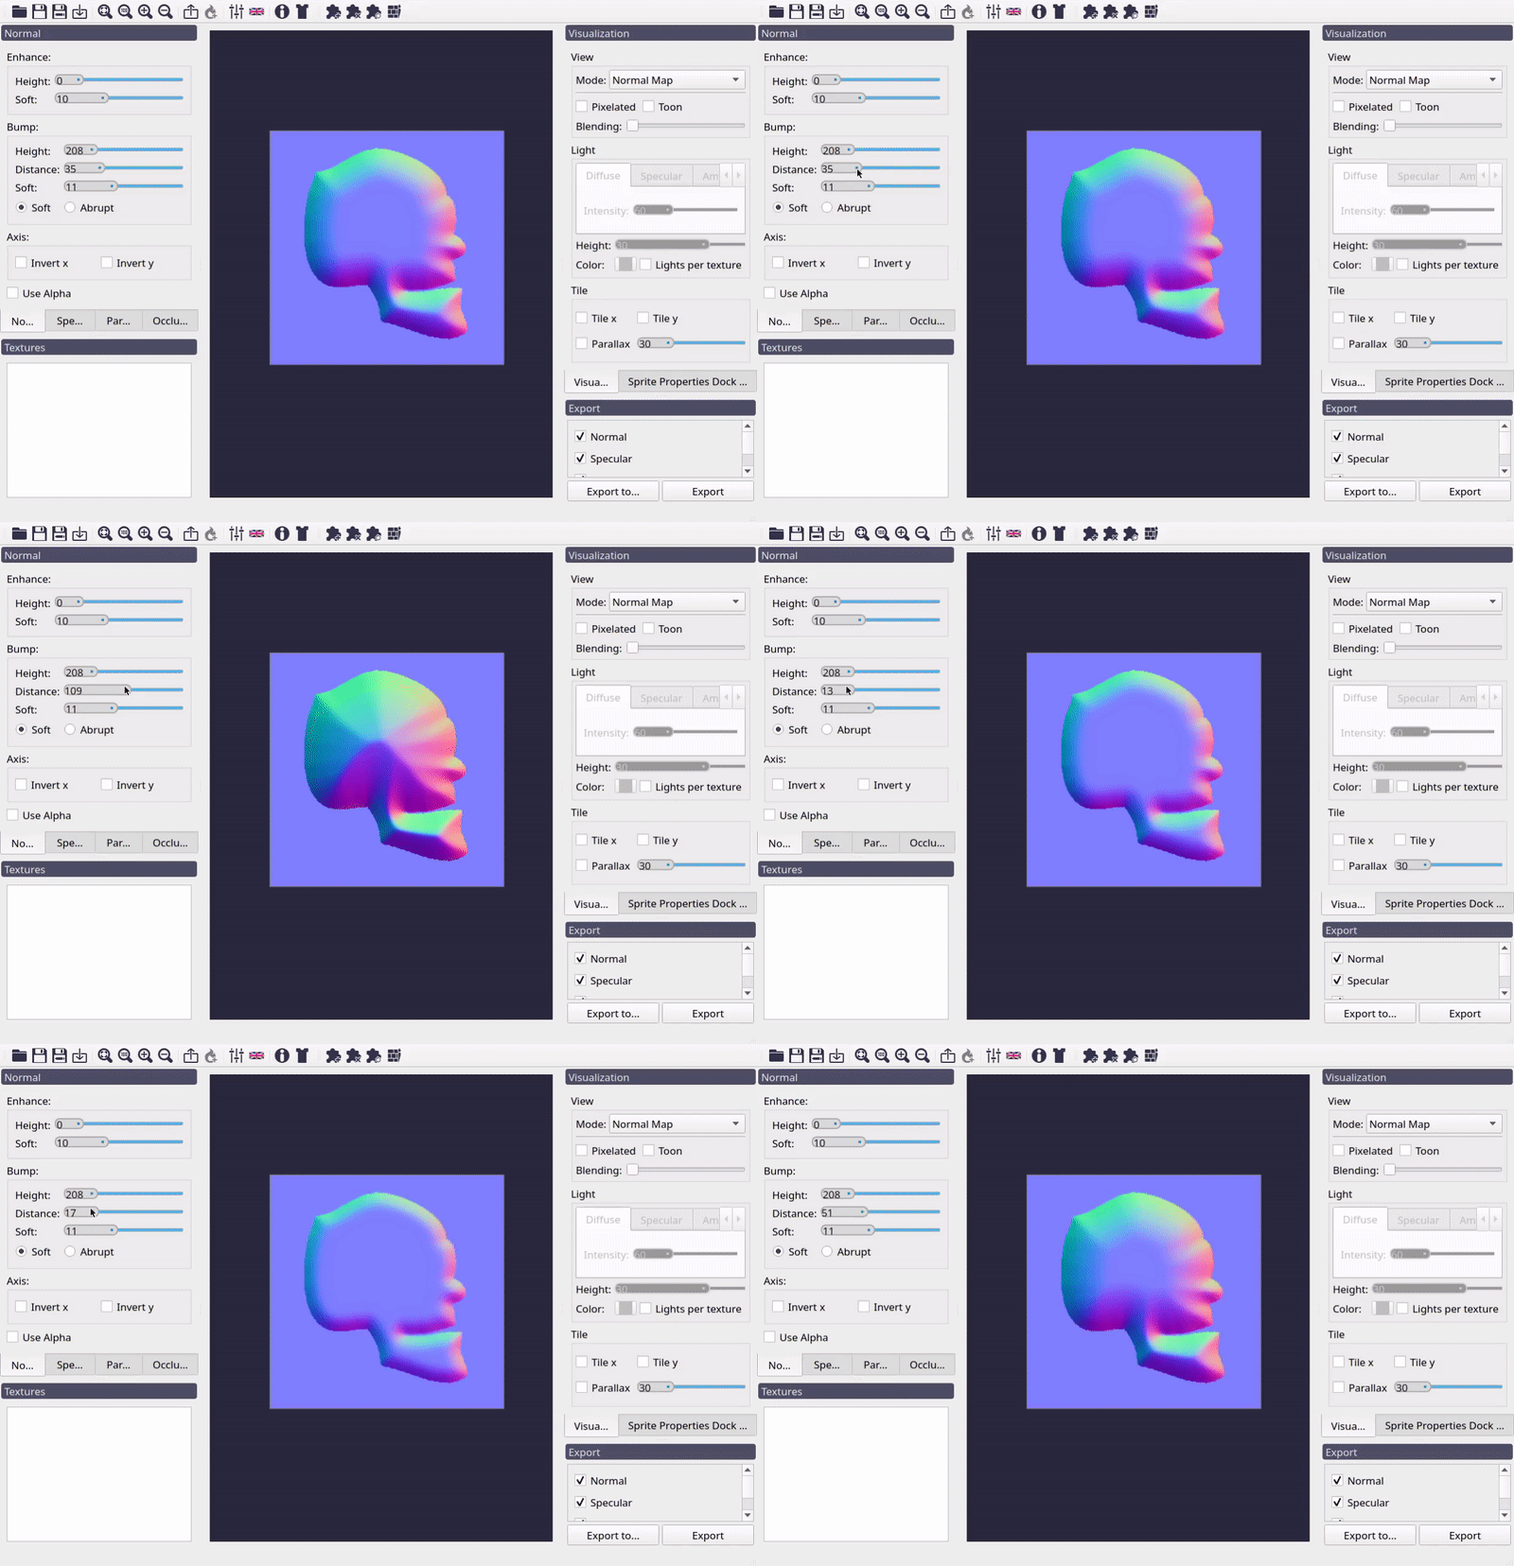
Effect of Bump distance control in the normal map.
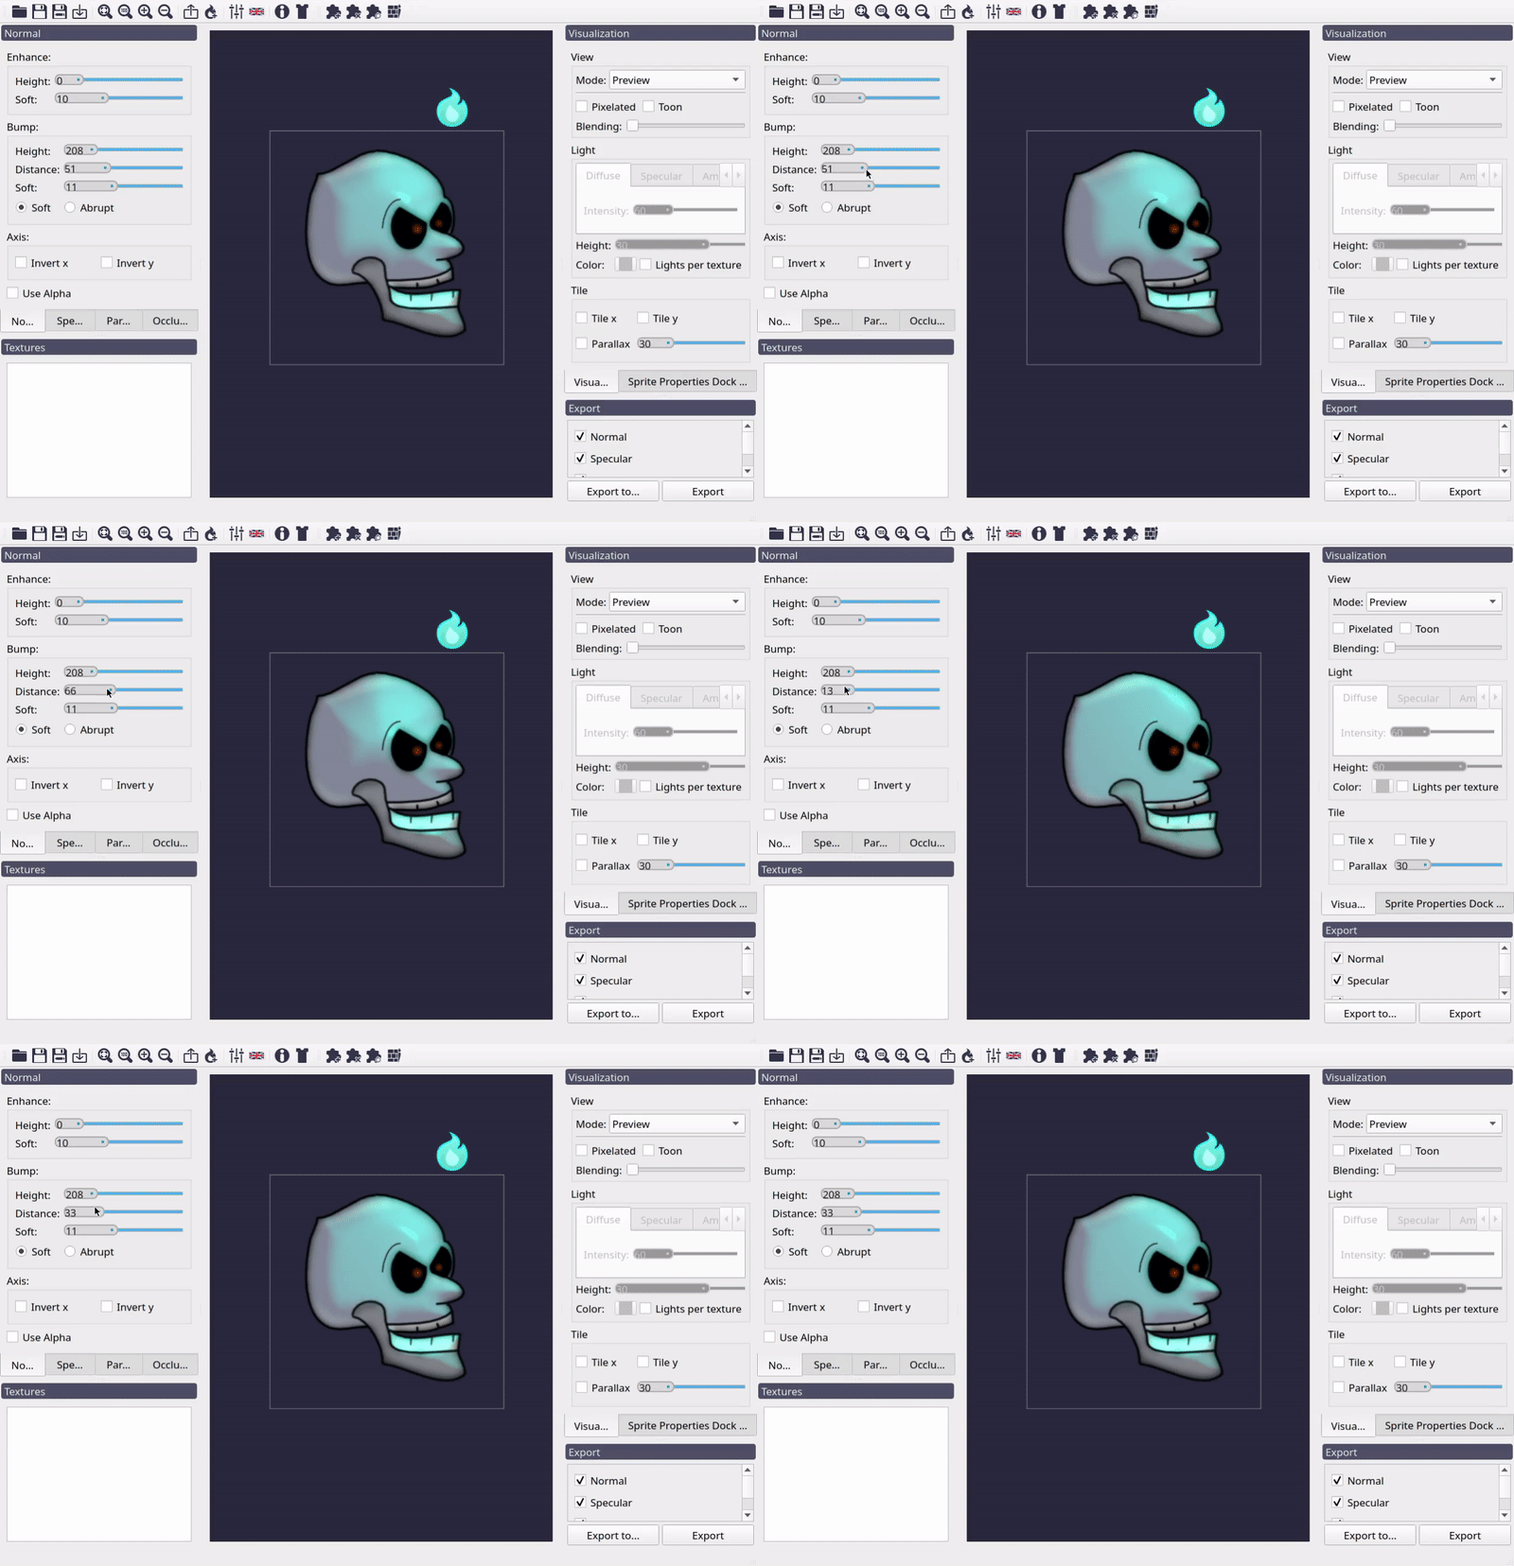
Soft Control
This control also makes the same effect that it’s homonymous in the Enhance group.
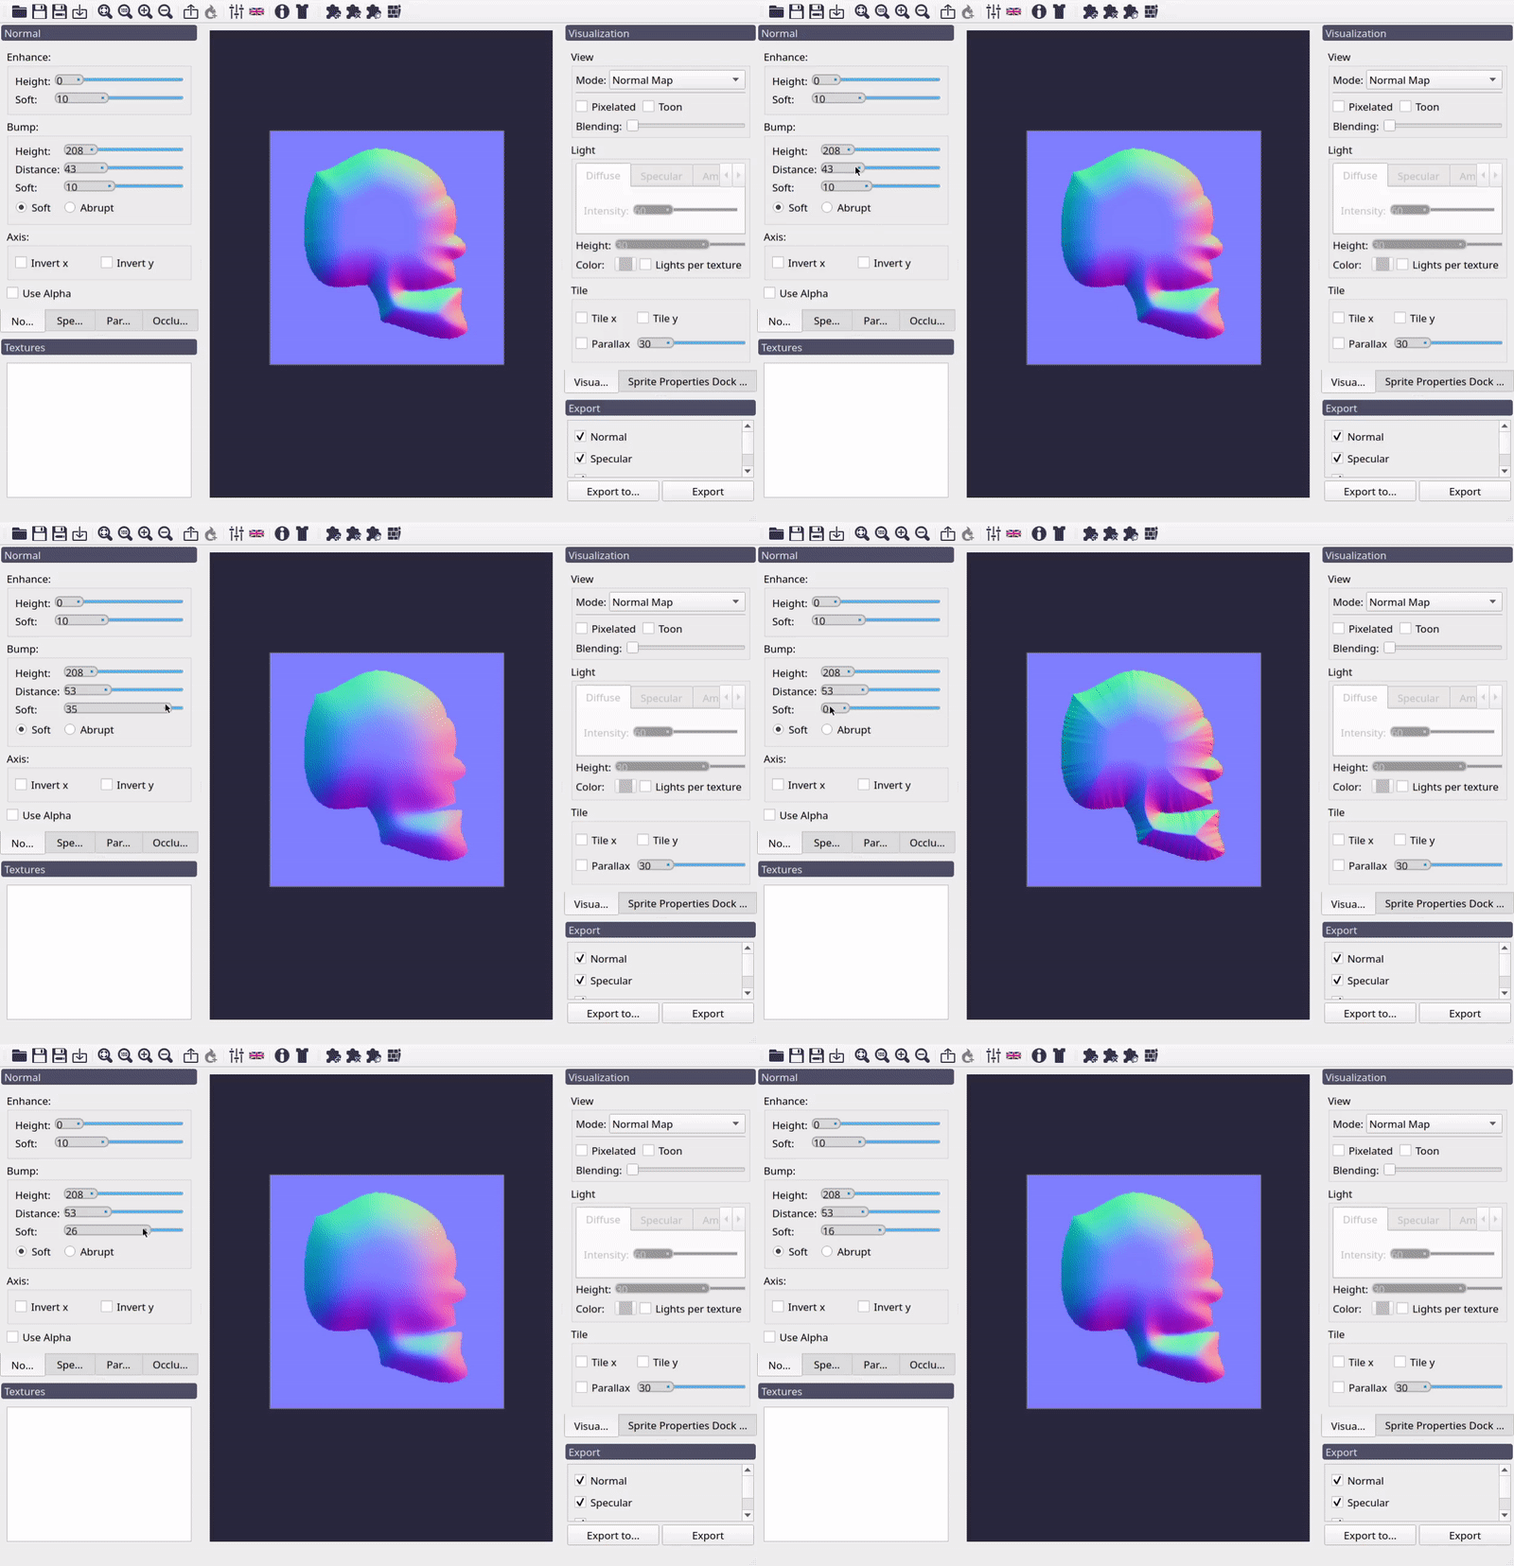
Effect of Bump soft control in the normal map.
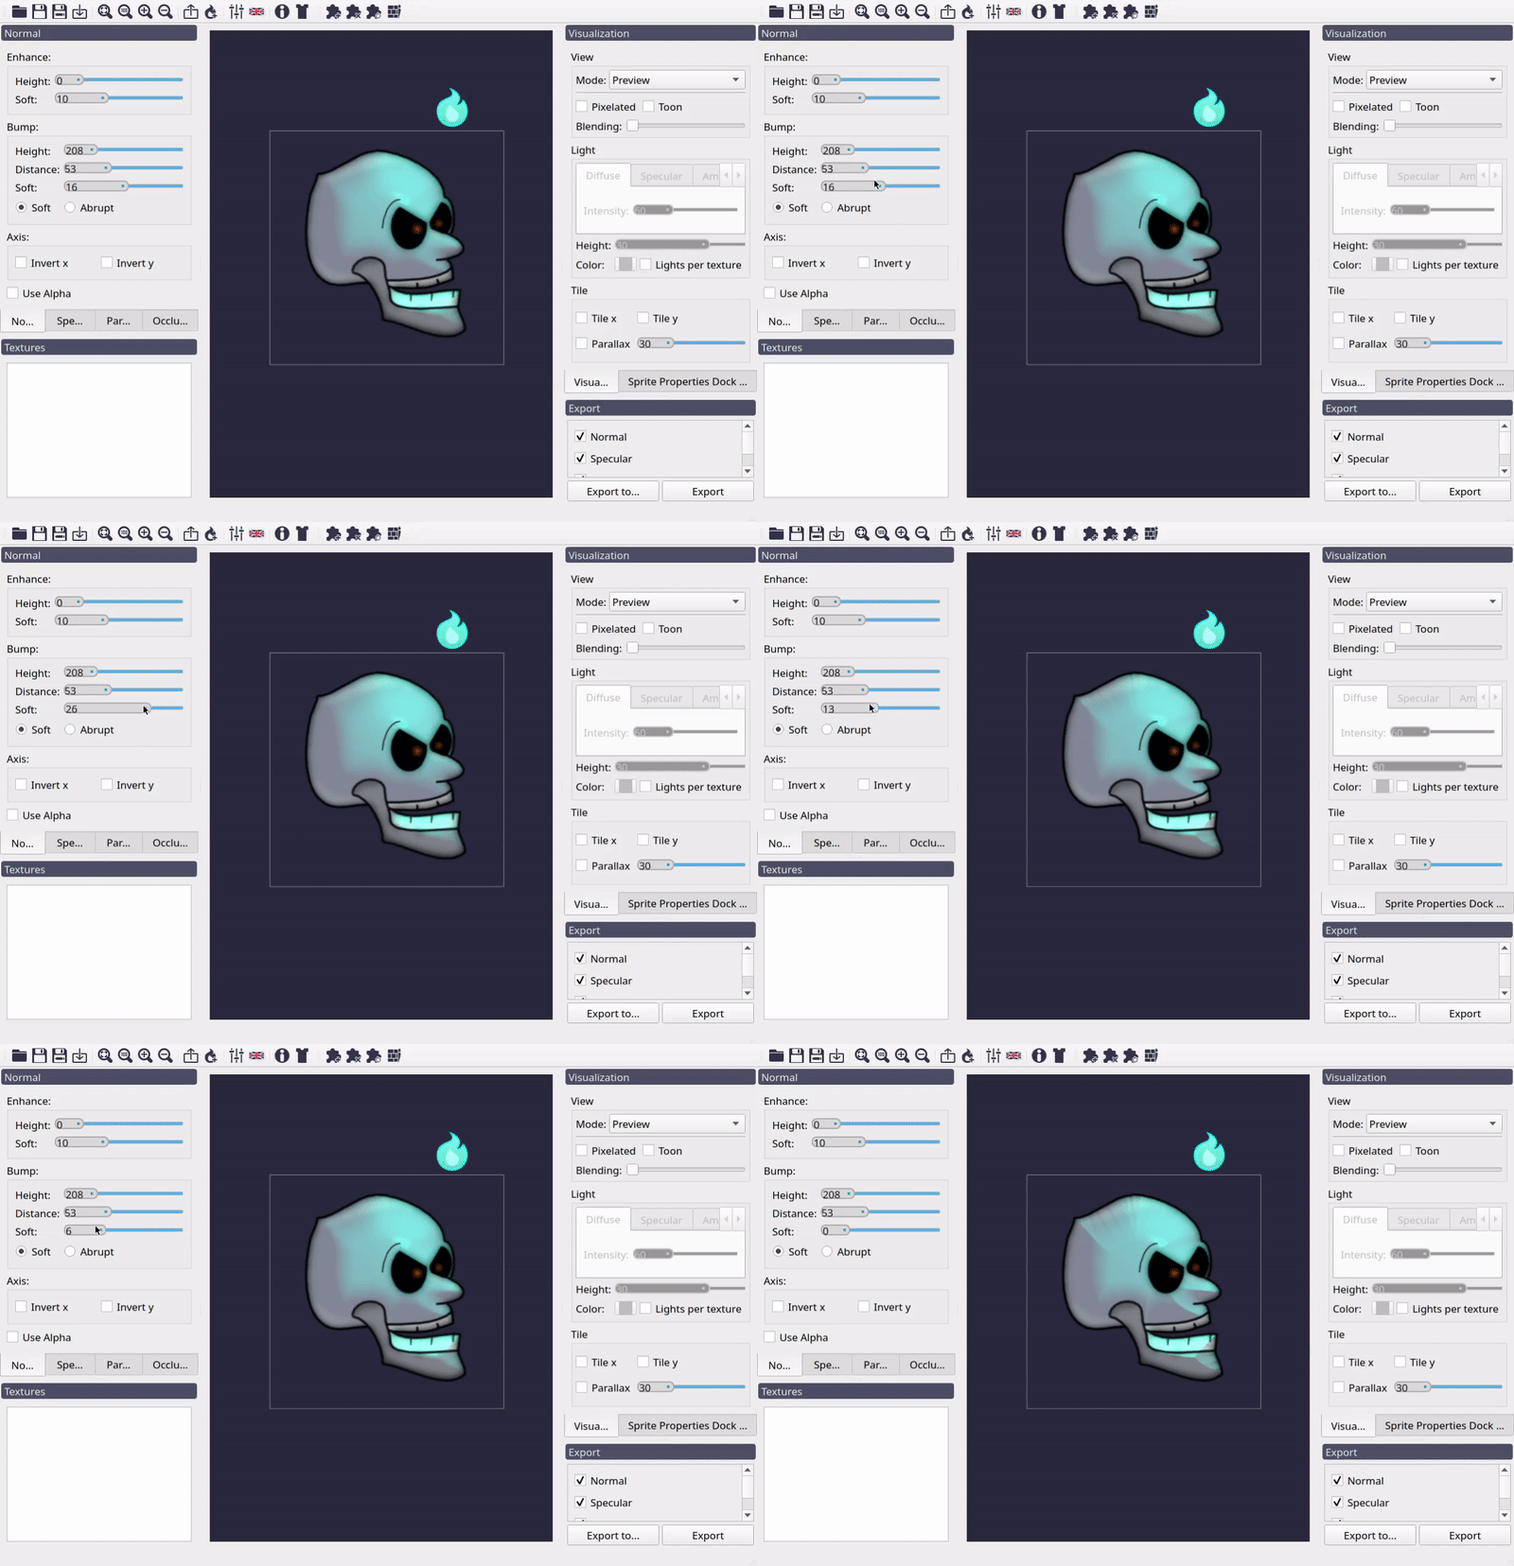
Effect of the Bump soft control in the preview.
Soft/Abrupt radio buttons
These radio buttons are used to specify how the distance should be calculated from the edges of the sprite to the center of it. Selecting Soft will make the height generated by Bump controls increase in a way that tries to emulate a spheric bump. Abrupt option instead, will make the height increase linearly.
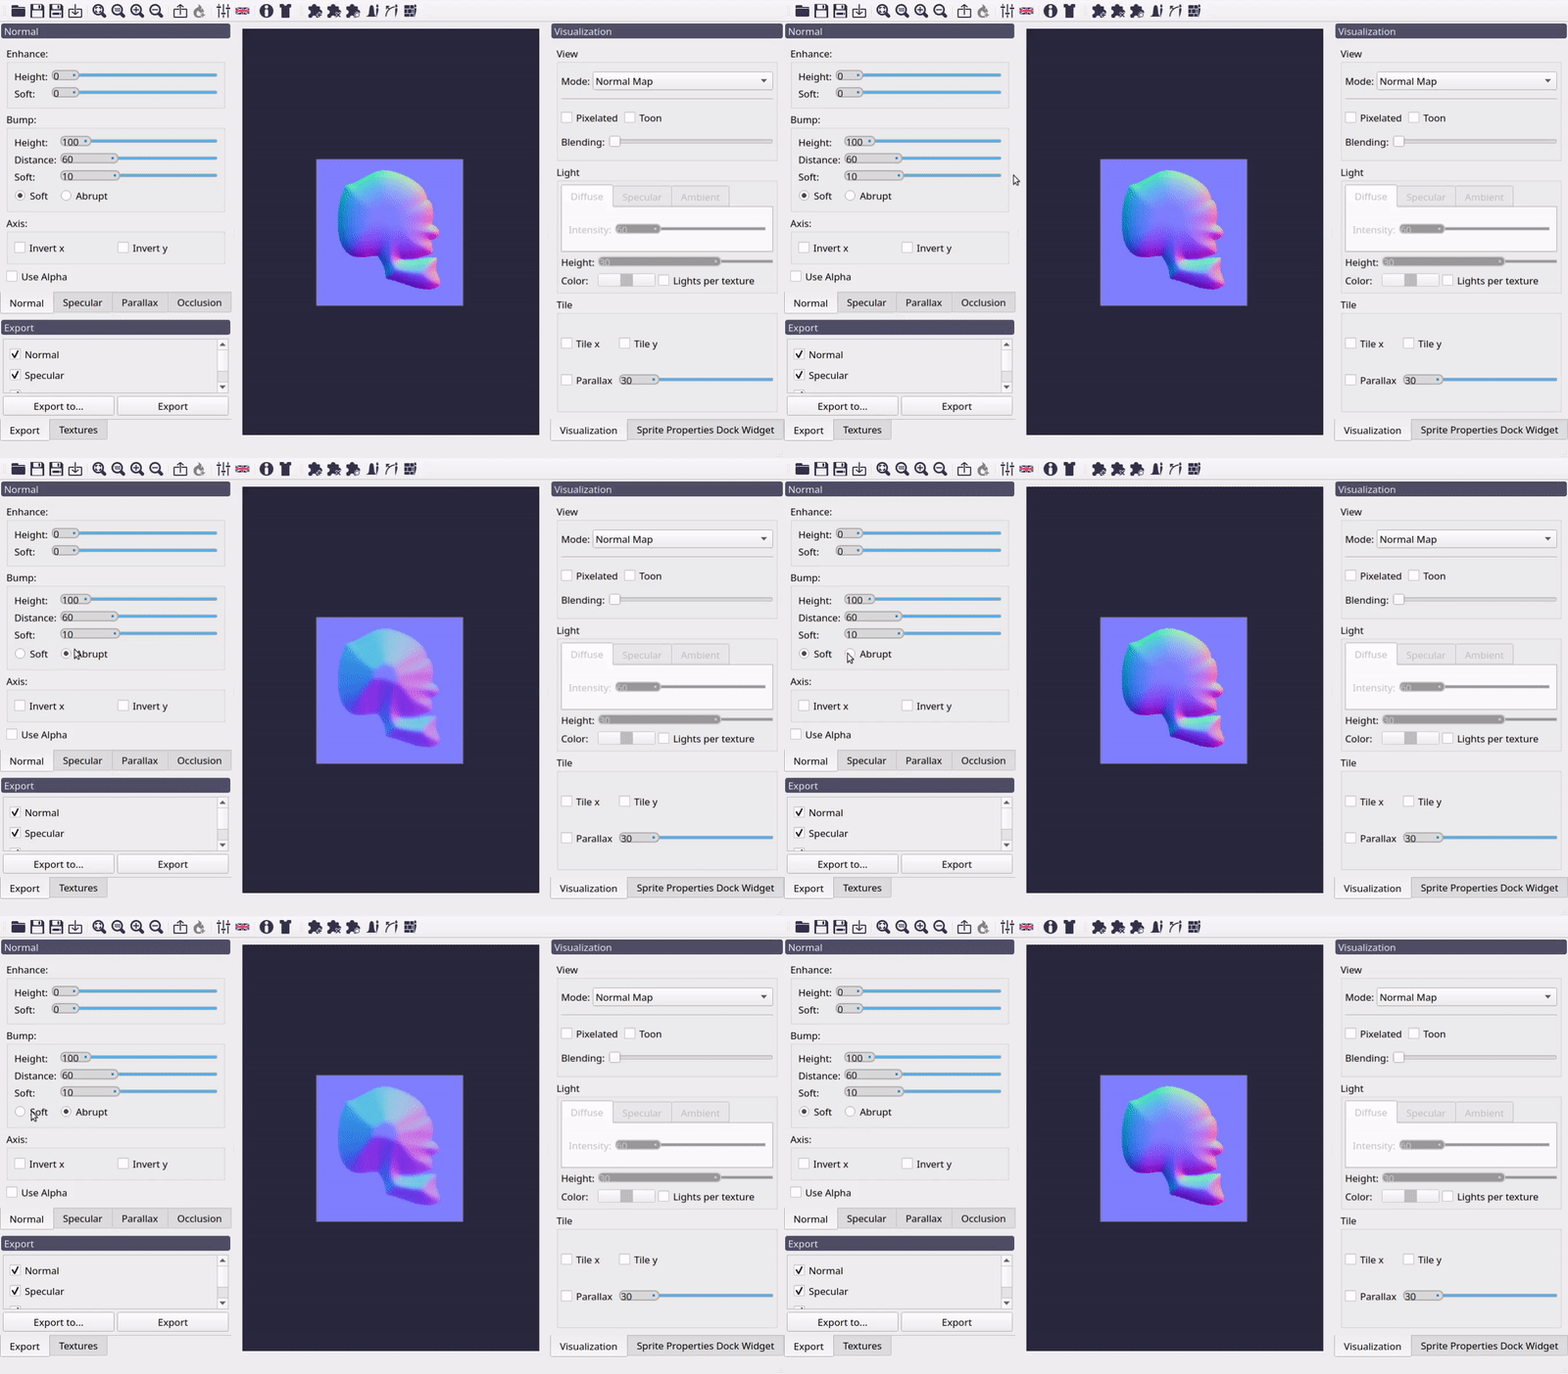
Effect of Bump soft/abrupt radio control in the normal map.
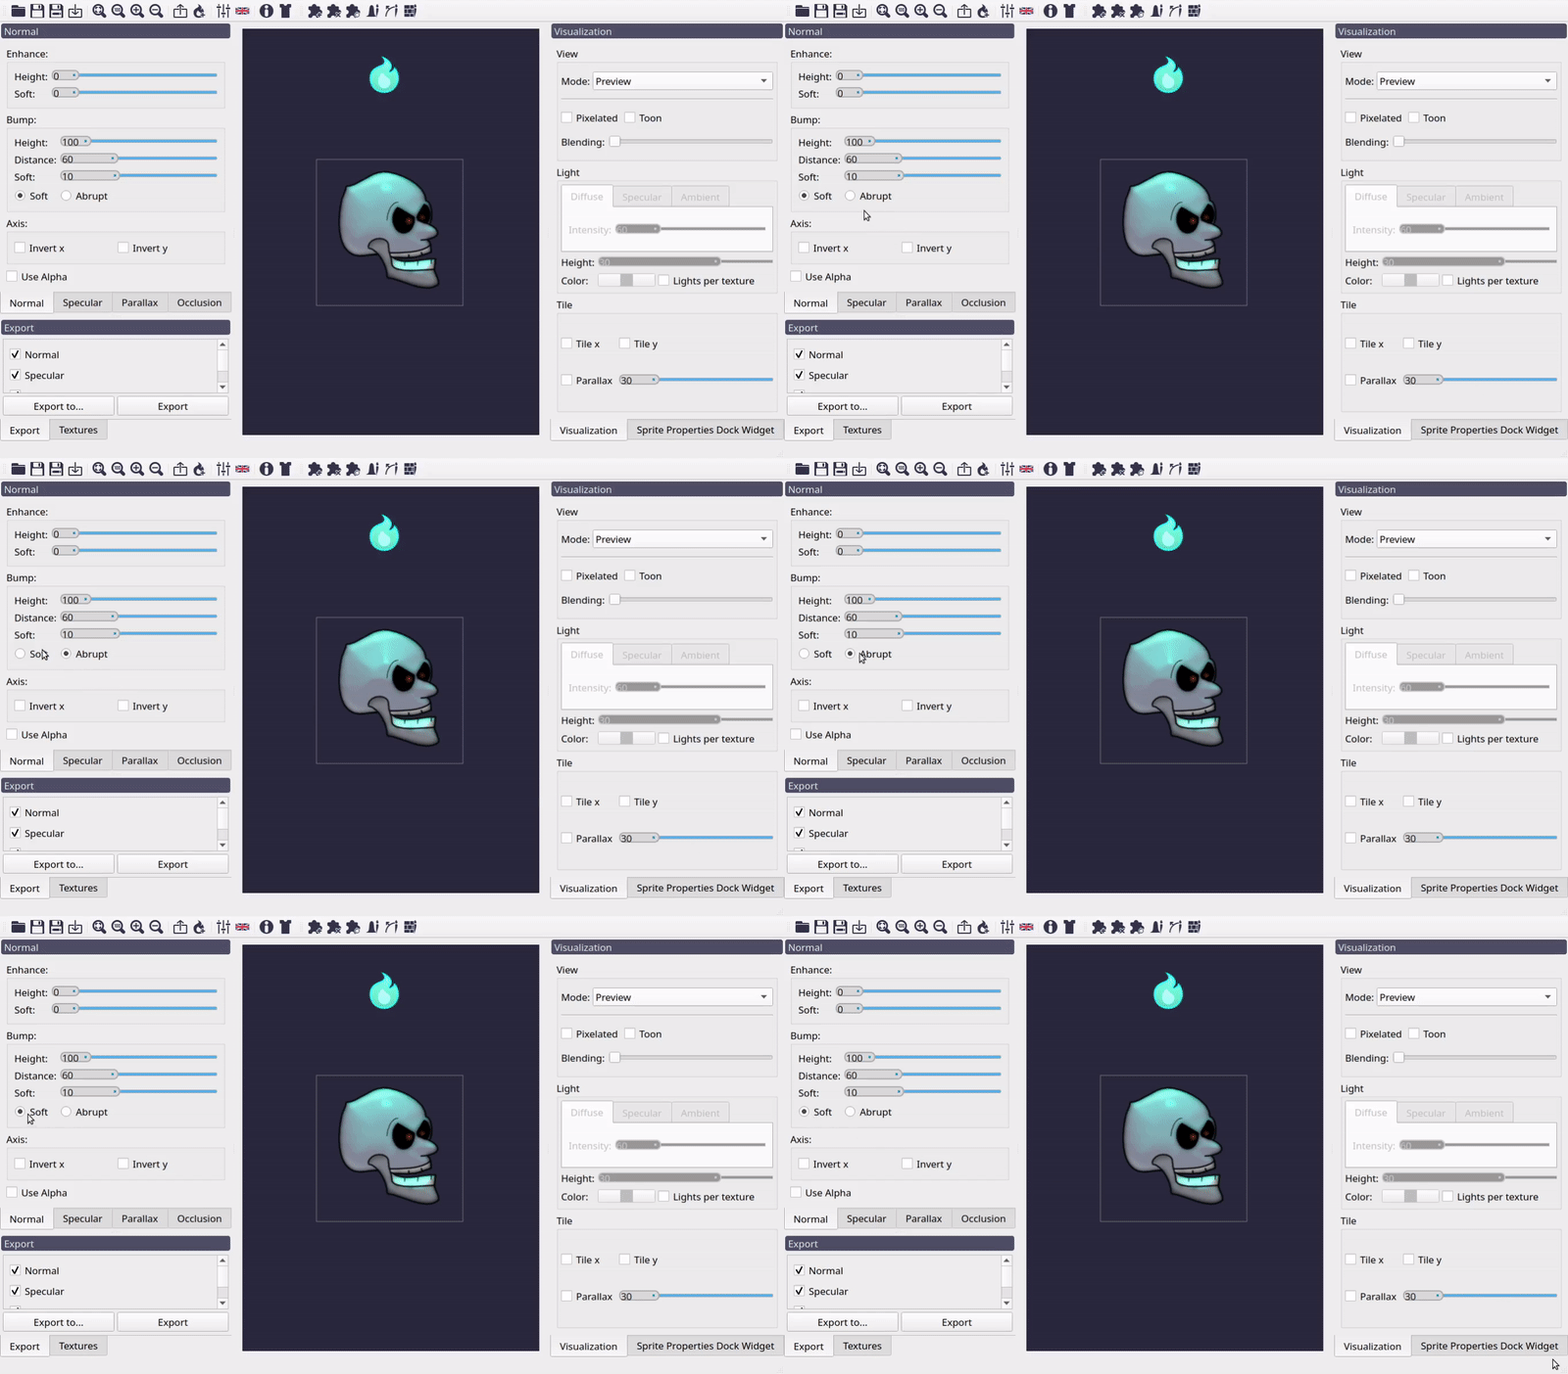
Effect of the Bump soft/abrupt radio control in the preview.
Axis Controls
This group contains only two checkboxes, used to invert de x or y component of the normal vector respectively. This is used in case you want the final effect looks like a bump or a sink.
Note
Some engines or tools (like Godot) use down direction as positive y. For normal maps to work correctly on them, you need to check Invert y control. Right now is the only way to achieve it, although shortly there will be an on-export option for this.
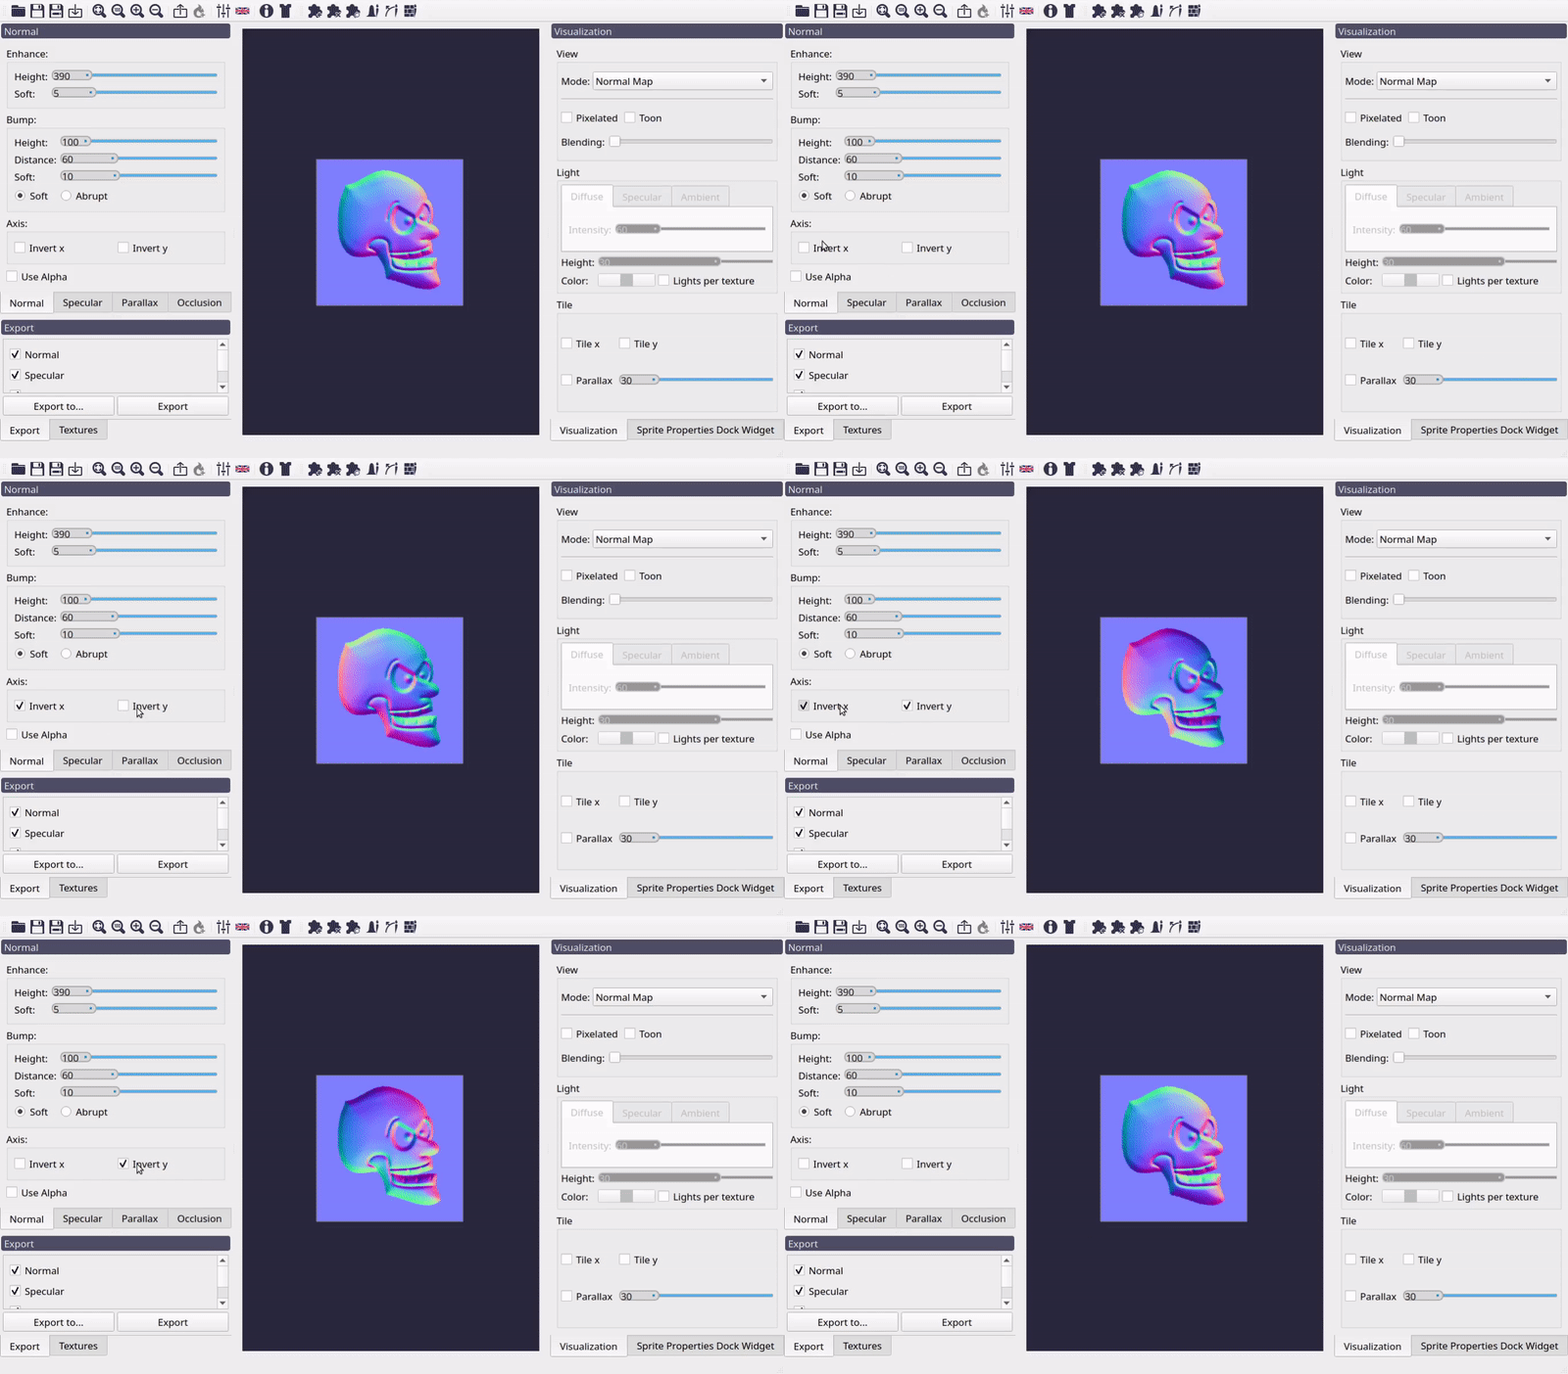
Effect of inverting axis in the normal map.
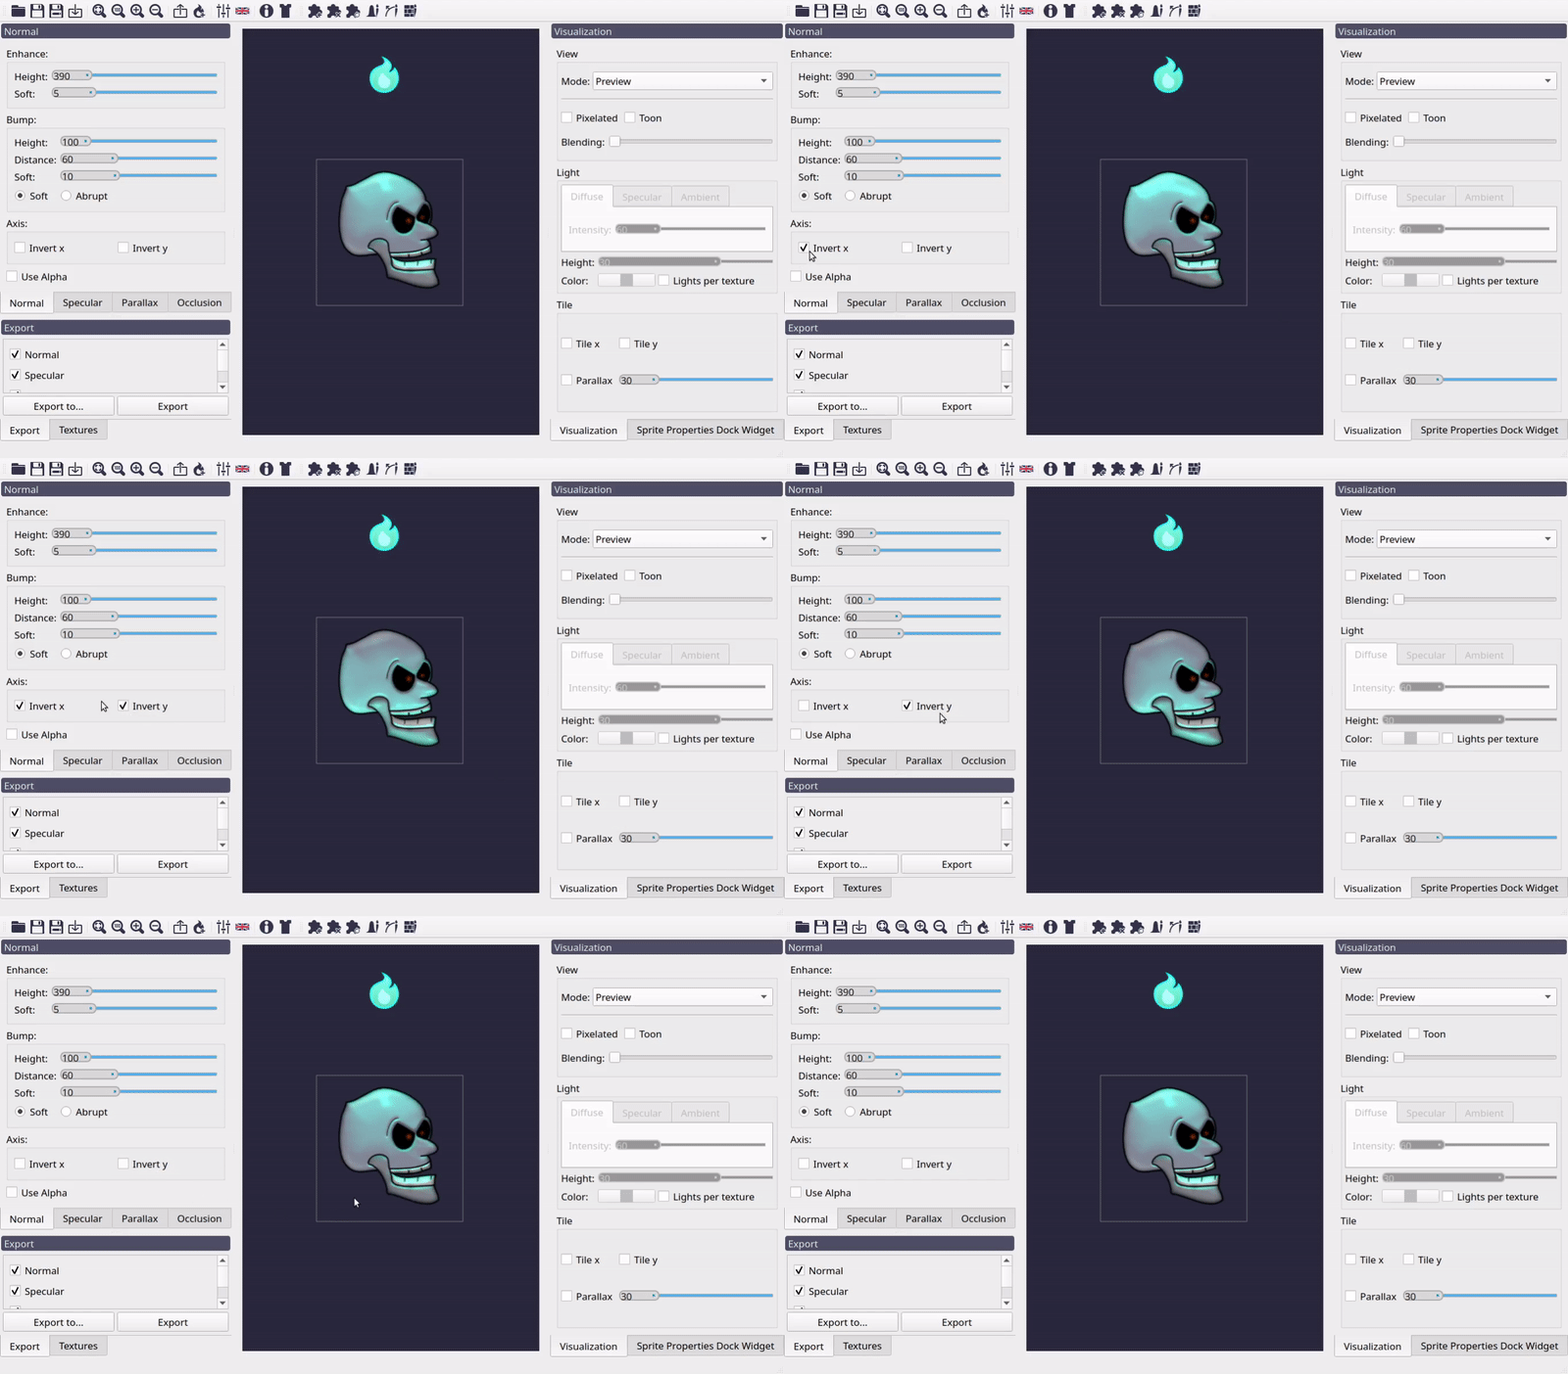
Effect of inverting axis in the preview.